
How to Create an App Without Coding:
Four Simple Steps

Building a mobile app without programming skills is easier and cheaper than you think. All you need to do is use an app builder like AppInstitute. With these tools, you can have your mobile app up and running in a matter of days or even hours.
Creating a mobile app is done in four simple steps:
1. Choose a template.
2. Tag your app.
3. Edit and add content to your app.
4. Publish your app.
In this article, we will go through each of these steps in detail and show you exactly how to create an app without any programming knowledge.
How to create an app without writing a line of code
To create a mobile app without writing a line of code, you need to use an app builder. These are tools with pre-programmed templates and functions that you can use to edit and customize your app.
Because the functions in app builders are pre-built, you do not have to code them yourself. And because you can customize the look, content, and features, you can create mobile apps that are just the way you want them.
AppInstitute is one of the most popular app builders. We have made the process of mobile app development as simple as possible.
We believe that you will be able to create a mobile app that will delight your customers, regardless of your technical skills.
Our mobile apps are perfect for small businesses that want to use an app to improve their service and compete with bigger brands.
- Restaurants using their mobile apps to enable contactless ordering, takeout and delivery.
- Coffee shops using their mobile app for loyalty programs or pre-orders.
- Hair salons using the app to manage bookings and loyalty programs.
- Radio stations providing an easily accessible radio stream to their listeners.
With our App Maker, you can quickly create both an iOS and Android app. This is important because publishing native apps for each platform ensures that your product can be used by all customers.
Step One: Choose Your App Template
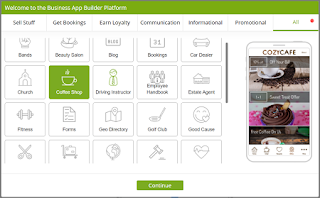
The first step in developing a mobile app is choosing a template. We've templates available for a variety of business types, industries, and use cases.
Each of these templates contains the features that are most useful to operators of that particular business type.
For example:
- The beauty salon app template makes it easy for salons to accept bookings. It also has a gallery where businesses can showcase haircuts and hairstyles.
- The coffee store app template includes a loyalty rewards program and the ability for customers to place orders in advance.
- The radio station app template offers features for a live stream and schedules.
All templates are customizable. That's, if a template doesn't include all the features you need for your app, you can easily add more in the steps below.
Step two: Branding
If you don't have a website or prefer to choose your colors, you can do so in the next step. Just click on the "Skip this step" button.
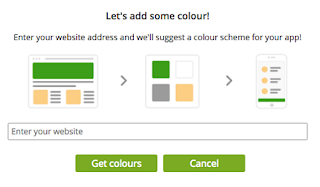
In this step you can enter your mobile number so we can send you a preview link to see how the app looks on a mobile device.
The colors you choose aren't the only way you can design your mobile app. Our app builder makes it easy for you to customize your app with images that you can use on the home screen or as a header image.
This will make your app instantly recognizable. Simply upload the images using the appropriate section and use our drag-and-drop editor.
The final step in the branding process is to upload your app icon. This is the logo people will see when they open your app or want to search for it in the App Store or Google Play.
Make sure your logo stands out and is instantly recognizable so users can quickly access your app.
Third step: Content
Each mobile app template comes with preloaded content that you can easily edit to suit your own business.
For example, you can change the text on the About page or add new images and descriptions to your menu.
The app builder also lets you easily add new tabs to your mobile apps.
Whether it's an "About Us" page detailing your company's contact and social information, a services page outlining your entire offering, loyalty programs, or easy-to-use forms. You can customize your content to create an app that works for any type of business.
It's also easy to remove features that you don't think will benefit your audience. For example, if you don't want to offer a loyalty program, simply delete it from the app.
Thanks to these customization options, even beginners can create an app unique to their business without writing a single line of code.
Once you've added content, you can set navigation options. Choose between a tab bar or a sidebar menu that lets your customers easily access your app's features.
Setting up the back-end of features is easy. You can customize the settings so that you receive a notification when someone places an order or sends you a message.
It's also possible to restrict access to certain pages to logged-in users only.
Fourth step: publish
After you've worked out the design and added the content for each section of your app, you just need to publish it. Users can then easily download the iOS or Android app to their phones.
Our app builder provides all our users with a user-friendly wizard that simplifies the publishing process. Just follow the steps to publish your app to the App Store, Google Play Store, or both.
There are several sections you need to complete before going live. First, you need to confirm that you don't violate any of the content warnings on either app store.
Then you can fill out the details that will appear in your App Store listing, including:
- Title of the app
- Icon name
- Categories
- Keywords
- Description
Comments
Post a Comment